 Do you need to take time out to get organized? Answer these questions to find out:
Can you find what you need in 15 seconds or less?
Can others in your home or office find what they need in 15 seconds or less?
Does your current way of organizing your environment keep you focused on what’s most important to you?
Do you like being in your environment and how it makes you feel?
If you answered NO to any of the above questions, keep reading. These tips will help you get organized.
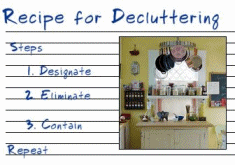
I use a three-step process when organizing any space. Whether, it is an office, an attic or garage, a kitchen or bedroom. The same basic process applies anywhere. Here’s the process: Designate, Eliminate, Contain. Below I describe this three-step process by demonstrating how it works when organizing a kitchen.
Step One: Designate the purpose of the space you are about to organize.
Create a “purpose statement” for the kitchen. What kinds of activities will take place here? Make a list of every activity or purpose you can think of. For example, in a kitchen you might list the following:
food preparation & clean-up
cooking
eating
storing kitchen items
storing recipe books
storing eating utensils
food storage
phone/message center
planning center (family calendar)
place for kids to do homework
social hub
bill paying center
Step Two: Eliminate anything that does not fit the purpose of this space.
CLUTTER: Anything you own, possess, or do that does not enhance your life on a regular basis.
Create four sorting piles or boxes:
- give away
- throw away
- store in this space
- store in another space
NOTE: I do not have a “sell” box above. My experience tells me that garage sales are very time-consuming and generally yield little profit, with lots of things leftover at the end. I have also found that you can GENERATE MORE MONEY in tax savings by donating gently-used items to charity than you can by selling most items.
Now you can go through the entire contents of the kitchen, with the above definition of clutter in mind, and sort everything into these four categories.
Begin by removing everything from the counters and walls (don’t forget the top of the refrigerator and inside the refrigerator). Sort through everything with your purpose statement or list in mind. Then do the same with all the drawers and cabinets. Sort all items in one area before moving to the next. If you are right-handed, work clockwise around the room.
As you go through the sorting process, ask yourself these questions. (NOTE: Although these questions are designed specifically for the kitchen, you can rework them a bit to apply to any space you organize.)
- Is this item useful to me? Have I used it in the past year? If not, move it out!
- Is it in good condition? Does it work properly? If not, either fix it or get rid of it.
- Do I have too many of these? If you cannot use them all, keep those in best condition and store excess supplies elsewhere or give them away. Being in good condition has nothing to do with whether or not you need it!
- Is this a seasonal item I can store elsewhere? (If you have limited space, you can store holiday and seasonal items in a labeled storage box or in a difficult-to-reach corner of a cabinet.
Step Three: Find a home for what’s in the “store in this space” box.
Everything needs a place. After you have eliminated things that do not fit the purpose of this space, purchase some organizing tools to use for storing items you place back into the cabinets and drawers or on the counters and walls. Use the following guidelines as you put things away:
- Store things used most often in drawers and cabinets that are easiest to get to.
- Store similar things together (microwave dishes, baking supplies, Tupperware & matching lids, etc.)
- Store your most often used eating utensils near the dishwasher. This will make it easier to unload when you have clean dishes.
- If you have small children, store things you want them to reach (healthy snack items, their drinking cup, etc.) down low, and things you don’t want them to reach up high (breakables, alcohol, toxic items, foods you want to limit or restrict from their diet, etc.)
- Store items on the counter only if you use them regularly (at least 2-3 times per week). Otherwise, put them away. For example, if you seldom make cookies, perhaps the cookie jar can go!
- Consolidate duplicate items into one container (spices, etc.). Exception: yeast or other things with expiration dates
Once you have put things away where you want them, use a label maker to label what goes where. Organizing tools, such as drawer dividers, can help keep things in their place. If you share the space with others, you’ll need to get the cooperation of others to put things back where they belong. Go back to the list you created in Step 1 and review it to see if you need to purchase anything to support the activities you identified. For example, do you have adequate counter space and lighting for the kids to do their homework at the kitchen counter? Do you have an adequate supply of the tools they need for homework (pencils, erasers, rulers, etc.)? Make a shopping list of things that you need to support the activities you’ve identified for this space. Once you’ve purchased them, keep them in the same place and teach others to put things back where they belong. For specific ideas on how to handle paper clutter,


